NARRATIVE DESIGN PROJECT
Making Your Own Sourdough Bread
Have you ever been interested in making your own sourdough bread?
You may have heard that making sourdough is a long, complex process, and if you’ve baked with a packet of yeast before, you may be wondering what makes sourdough bread so special.
Both yeast and sourdough starter are microorganisms that act as leaveners, consuming the natural sugars in the dough and producing carbon dioxide, which creates that spongey, delicious texture.


However, while yeast in the packet is commercially produced to be uniform in nature, sourdough starter contains a heterogeneous mix of wild yeast and bacteria.
As a result, each sourdough starter is a unique mix of microorganisms, and while commercial yeast in the packet is dried out and preserved in an inactive state, sourdough starter must be regularly fed to keep it alive.
THE BAKING PROCESS
What do I do?
Day 1: 7:00 AM
Feed Starter
Feed a sourdough starter 4-12 hours before starting the dough.

The yeast wakes up, starts feeding on the flour and make more yeast while also releasing carbon dioxide. The bacteria feed on the flour too and create sugar (which the yeast can continue to eat), tangy acids like lactic acids (which give sourdough bread that distinct flavor), and more bacteria.
As the microbes eat, reproduce, and release carbon dioxide, the starter becomes active and its consistency becomes thick, bubbly, and stretchy.
Day 1: 12:00 PM
Make Dough
Combine warm water, active starter, salt and flour with a wooden spoon or even just your hands in a large mixing bowl.
Cover with plastic wrap or a lid and allow to rest for 30 minutes for the water to hydrate the flour.

Autolyse begins, and the water and flour are the stars of the show. As the water hydrates the flour, the large starch molecules will break down, creating the building blocks needed to start building gluten proteins, which are essential for any bread’s texture and shape.
Day 1: 12:30 PM
Stretch & Fold
Grab the edge of the dough and pull up stretching it out as you pull upwards. This may be difficult and you may need to kind of bounce the dough to get it to stretch. Place dough that is in your hands back into the center. Turn the bowl about a quarter turn and complete another stretch and fold. Repeat two more times. This is considered one round.

The goal here is to create a strong, structured network of gluten proteins. Currently, the gluten has formed, but the molecules just started linking to their neighboring molecules in a tangled mess.
By stretching a folding the dough, we are essentially playing matchmaker - helping the gluten let go of their old, poorly made links and bringing new molecules near each other to form better connections.
Thirty minutes later, complete another round of stretch and folds. Cover and allow the dough to rest another 30 minutes.

The 30 minute rest periods allow those new connections between the gluten molecules to be made.
Complete one last stretch and fold round.

Repeating the process more than necessary may cause an overdeveloped network with too many connections, which would create a dense, gummy bread.
Cover with a lid, damp towel, or plastic wrap.

The dough has begun bulk fermentation, the most important step of the sourdough baking process. The yeast from the starter (yes, they are still present!) will munch on the sugar molecules from the flour and produce carbon dioxide bubbles, puffing up the dough, and these bubbles are held in place by the structural gluten network.
Temperature is key here:
If the dough gets too cold, the microbes will slow down and the process will take much longer. Some bakers prefer this and opt to bulk ferment their dough in the refrigerator.
If the dough gets too warm, the bacteria in the starter can start multiplying much faster than the yeast, which creates an overproduction of acid. This acid can break down the gluten network and harm the yeast - destroying the dough from the inside out.
Let the dough bulk ferment in a warm place until it has doubled in size. This could be anywhere from 6-12 hours (or longer) depending on the temperature of your kitchen, maturity of your starter, etc. Be careful not to let it over ferment.

Fermentation is a true Goldilocks problem:
If we’re not patient enough, we’re cutting off the microbes before they finish eating all of the sugars. Under-fermented dough creates an irregular loaf that is very dense and gummy with large, random air pockets.
If we miss the window, the yeast begin to run out of food and die, more acid is created by the bacteria, and the gluten network starts breaking down. Over-fermenting dough creates dense loaves with minimal rise and collapsed, shriveled-looking bubbles inside.
Day 1: 9:00 PM
Shape Loaf
Place the dough on a clean work surface that has been lightly dusted with flour. Roll out the dough into a long rectangle and pat down the dough to pop any large air bubbles.

You might be wondering why the dough is patted down when we just spent 6 hours letting those bubbles develop. Since I’ll be baking my bread in a loaf pan and using it for toasts and sandwiches, I want a tighter, more uniform shape to my bread. Deflating the dough also gives it additional time to rise again during the second rise.
Bring the top edges of the dough together like a paper airplane and pat down. Then continuously fold the dough onto itself in a series of folds until you reach the bottom edge. Fold the edge back onto the bread and pinch close, securing the seam.

Shaping the dough helps add structure to the bread. Without it, bread turns out flatter, especially when using baking methods other than with a loaf pan.
Transfer to an oiled loaf pan seam side down and cover with plastic or place in a plastic bag and tie the ends. Let the dough rest for 12-15 hours in the refrigerator.

It’s time for proofing, the second rise. The microbes will continue to eat and release new carbon dioxide, which will re-inflate any bubbles that have been depleted during the shaping process.
Placing the dough in the fridge is called a retard. It helps prevent the dough from over-fermenting while also letting the flavor develop since the bacteria will be able to produce more lactic and acetic acids while not quickly killing off the yeast or overly-damaging the gluten network.
You can also let the bread proof at room temperature for 3-4 hours, but this increases the risk of over-fermentation, which would result in a collapsed gluten network and a flat, dense loaf.
Day 2: 9:00 AM
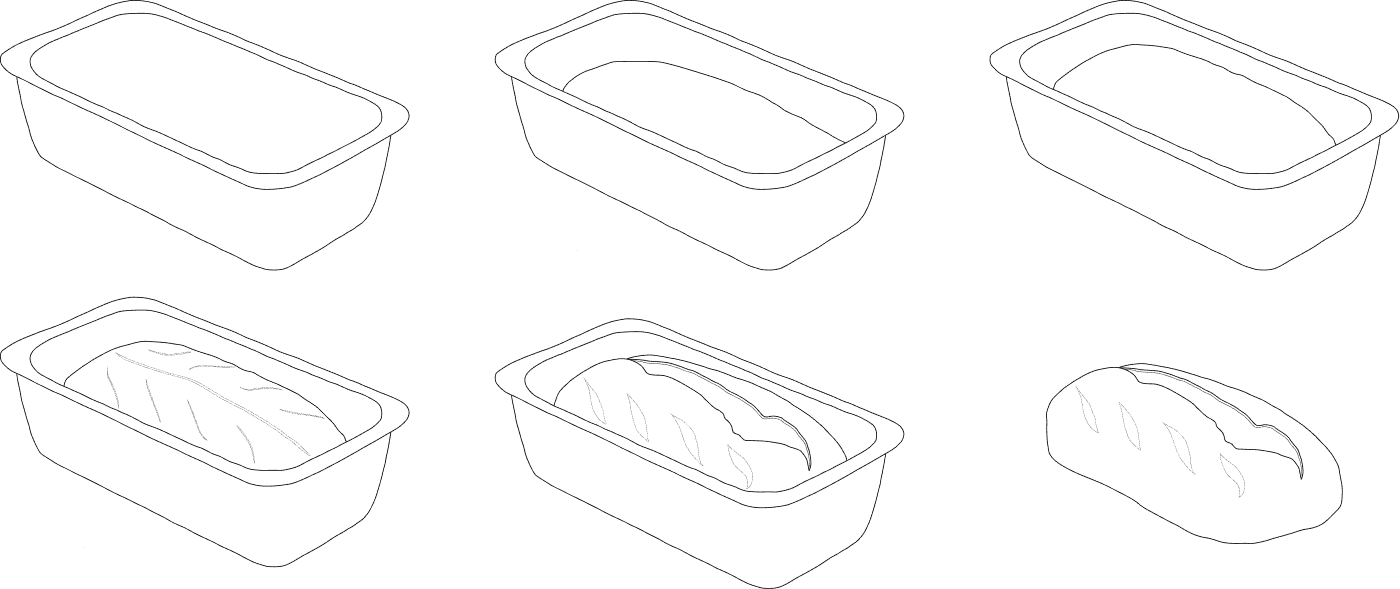
Score & Bake
Take the loaf pan out of the fridge and dust with flour, if desired. Score with scissors or a razor blade. I like to do one long, deeper score (called an expansion score) and then a cute design for the other score(s).
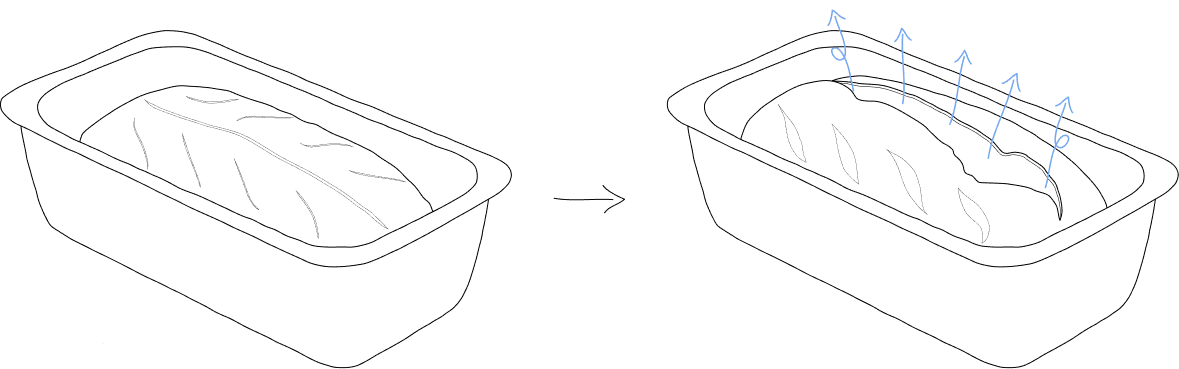
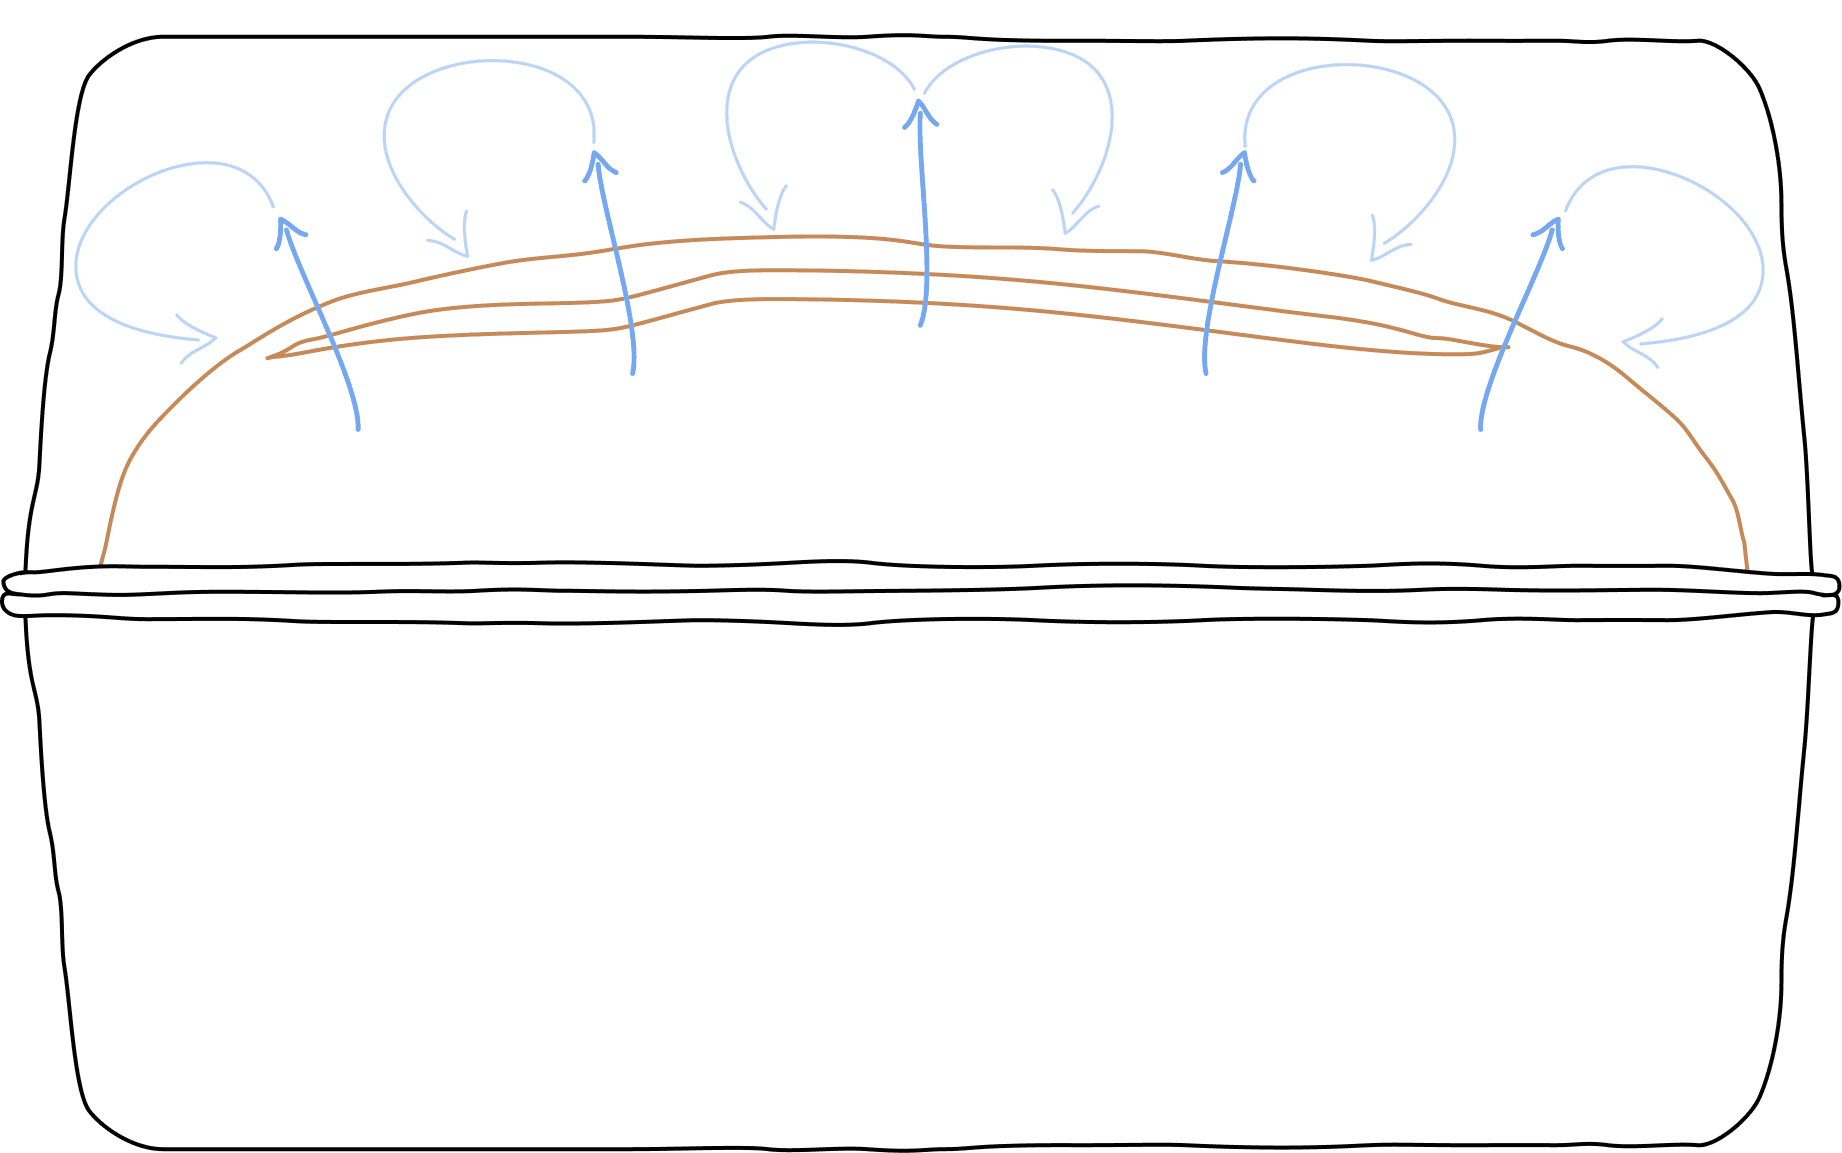
As the loaf bakes, it will rise and expand. Without scoring, the pressure from trapped steam within the dough will force through and burst in random places.
Scoring the loaf with a long expansion score provides an escape route to the internal steam and controls the expansion. This results in a better "oven spring" and a more symmetrical loaf.
The more shallow cuts will also let a small amount of steam out, but their purpose is aesthetic rather than functional.
Cover the dough using a second, identical loaf pan. Place the covered loaf pan in a cold oven and then set the temperature to 425. Set a timer for 45 minutes.
As the dough bakes, steam is released. This steam contains flavor compounds and concentrates, and the cover will trap it close to the dough, infusing the crust with more flavor.
After 45 minutes, take off the cover and let the loaf bake for an additional 15 minutes to brown the top crust.
After 1 hour of total baking, carefully take your bread out of the oven.
Day 2: 10:30 AM
Cool & Slice
Once the crust has cured for 10-15 minutes, let the loaf cool for 1 hour on the countertop.

At this point, temptation may be setting in, but it's important to wait before slicing into your loaf!
The interior is still cooking and releasing steam. If the loaf is cut too soon, then this steam will remain in the bread, and the sliced bread will be gummy in texture and appearance.
After over 27 hours, the sourdough is finally ready to slice and enjoy!

REFERENCES
Further Reading on Sourdough
Bass, Lisa. “Beginner’s Sourdough Bread Recipe.” Farmhouse on Boone, 10 Apr. 2023, www.farmhouseonboone.com/beginners-sourdough-bread-recipe/#wprm-recipe-container-40698.
Chin, Tim. “The Science of Sourdough Starters.” Serious Eats, 27 Jan. 2025, www.seriouseats.com/sourdough-starter-science.
Freebairn, Kate. “Soft Sourdough Sandwich Bread Recipe.” The Pantry Mama, 5 Oct. 2020, pantrymama.com/sourdough-sandwich-bread-super-simple-sandwich-bread-with-a-soft-crust/.
Lance, Shalene. “The Science behind Each Stage of the Bread-Making Process.” Modernist Cuisine, 17 May 2024, modernistcuisine.com/mbah/the-science-behind-each-stage-of-the-bread-making-process/.
Newman, Karyn Lynn. Sourdough by Science : Understanding Bread Making for Successful Baking. New York, Ny, The Countryman Press, An Imprint Of W. W. Norton & Company, 2022.
Prior, Jenny. “When Is Sourdough Finished Proofing? The Signs and a Test.” Living Bread Baker, 11 Feb. 2023, livingbreadbaker.com/whenisdoughproofed/.
Stefanescu, Andra. “Sourdough Baking Most Common Terms - Sourdough Explained.” Sourdough Explained, 18 Sept. 2024, sourdoughexplained.com/sourdough-baking-most-common-terms/.
The Serious Eats Team. “What Is Gluten? The Science behind Great Dough.” Serious Eats, 7 Mar. 2021, www.seriouseats.com/what-is-gluten-free-bread-dough-pasta.
Unco B. (2020, November 8). Cure Your Bread! The Dawg House! https://dawghousebakery.com/2020/11/08/cure-your-bread/.